Houzz Pro is an all-in-one business management software designed specifically for professionals in the home building, remodeling, and design industry. It offers a range of features to help streamline and organize various aspects of running a business, such as estimates, invoices, and project management.
Adding Calendar Integrations in Houzz Pro
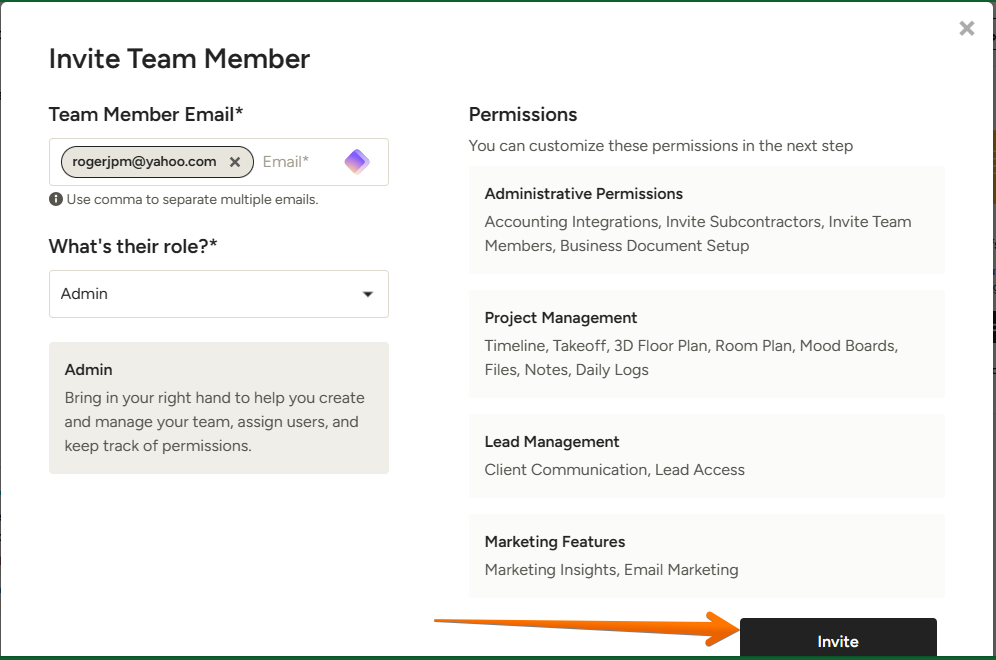
Next, let's learn how to invite client team members and subcontractors to your Houzz Pro account. Let's see how to carry out this process. The first thing you have to do is to go to the tool's dashboard. Next, we will go to the top right corner and click on Invite Team Member.

Consequently, a new floating window appears to start the procedure. The first thing we have to do is to add the email address to send the invitation. Additionally, we can separate each email by a comma, to reach multiple accounts. The other variable that we can define is the role assigned to the invited member. In fact, we can configure that he/she belongs to the Administration group, to the field team or to the financial team. When you have finished the configuration, just click on Invite.
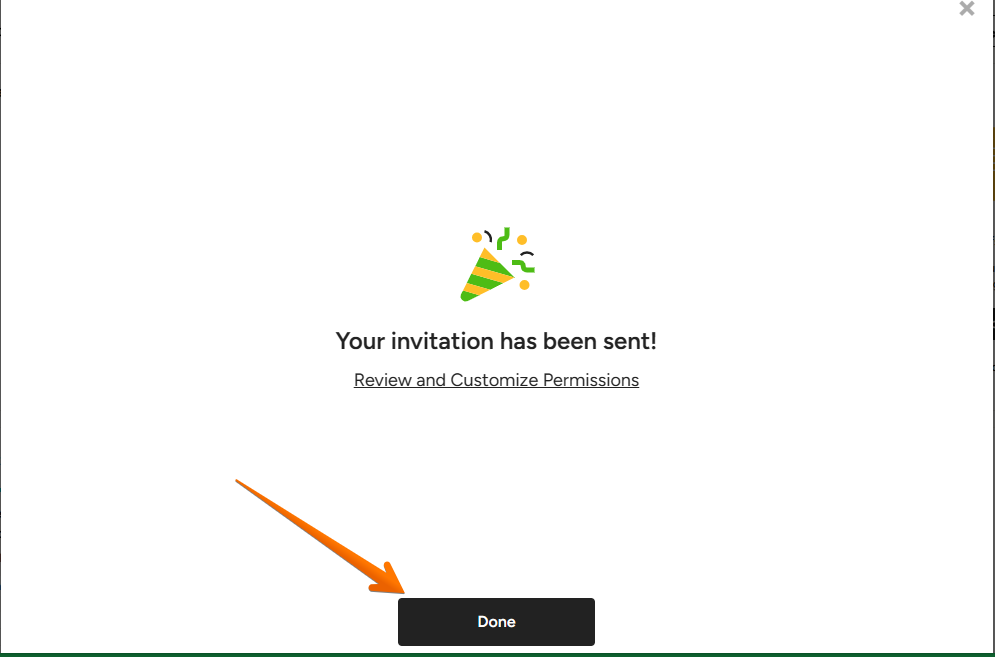
You will then receive a confirmation that the invitation was successfully sent.
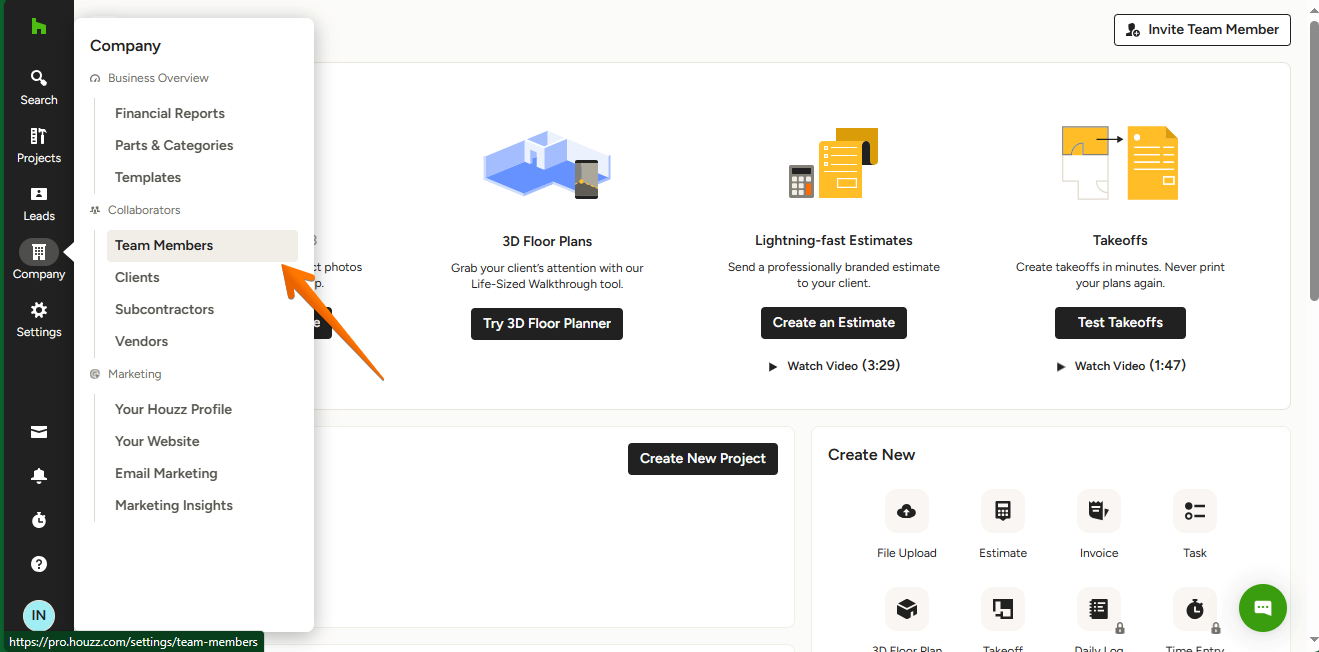
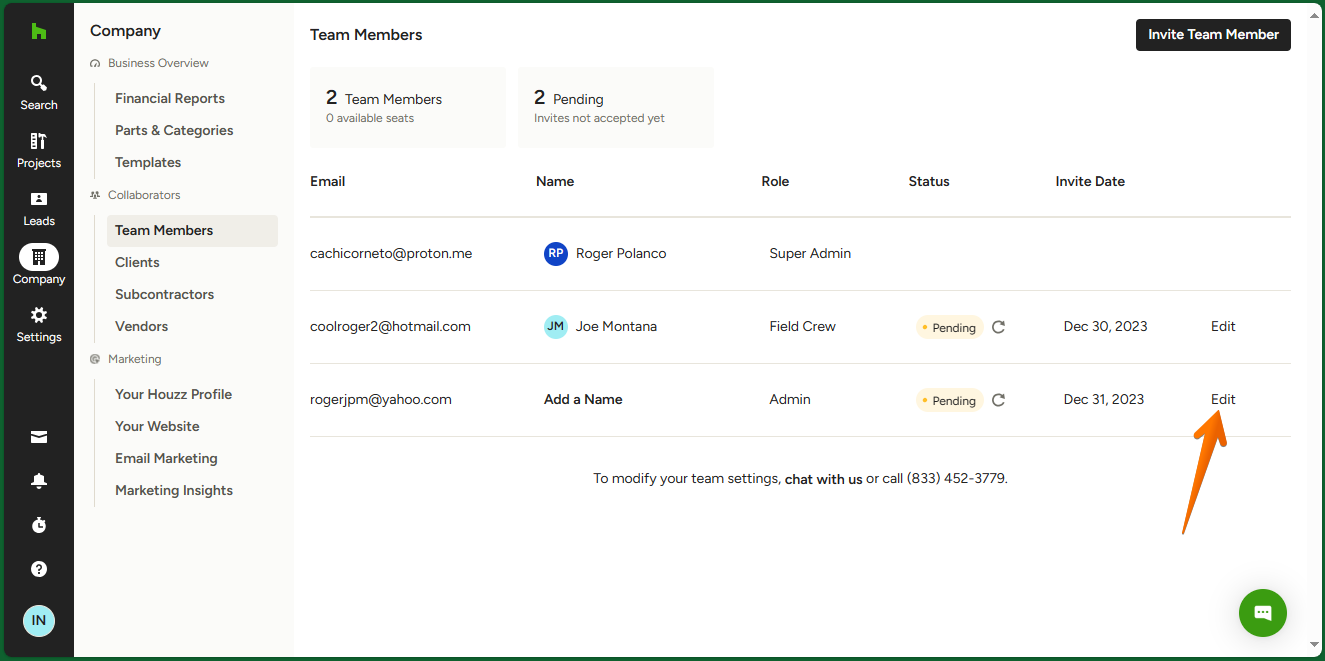
On the other hand, we will be able to check the status of the team members. For this purpose, just hover the cursor over the Company section in the left column of the screen. Then, several items will be displayed. Please scroll down to the bottom to the Collaborators section. Finally, click on Team Members.
In this new screen, you can see, what is the status of all team members. Additionally, if you notice, next to the invitation date of each member, there is an Edit button. Let's click on it.
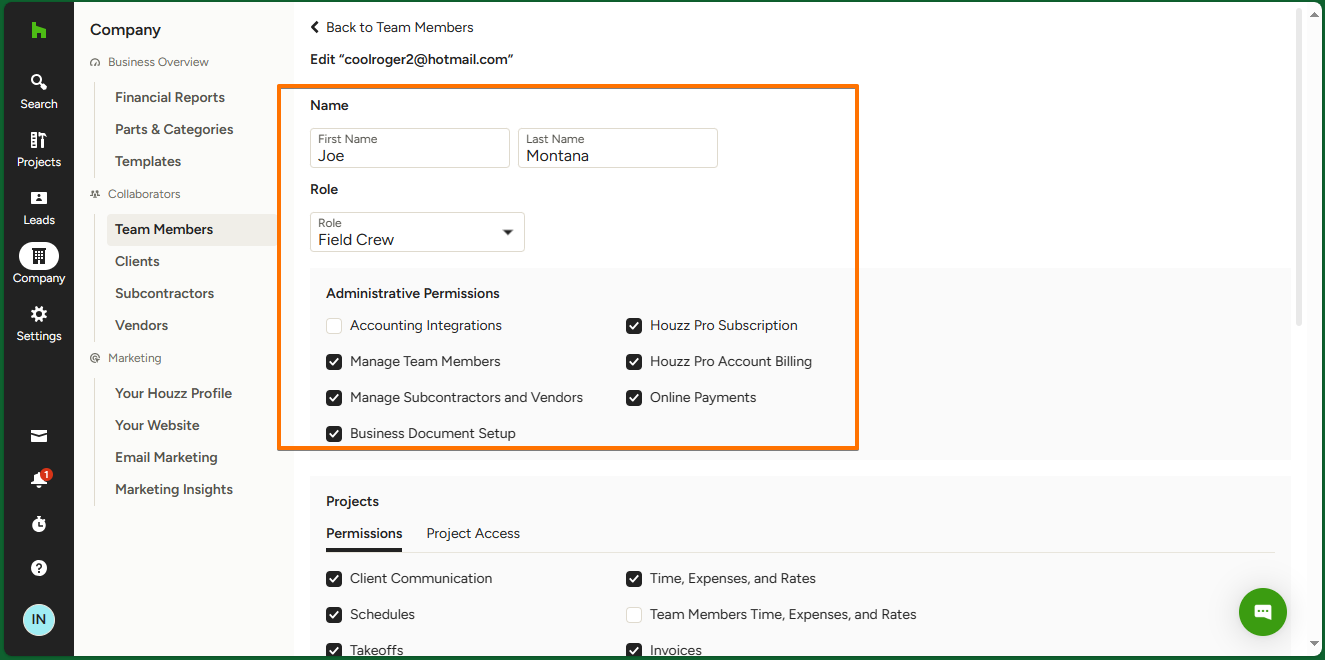
Once there, we have the freedom to completely modify the behavior of that particular member. Foremost, we will be able to modify the name, the assigned role and the corresponding administrative permissions.
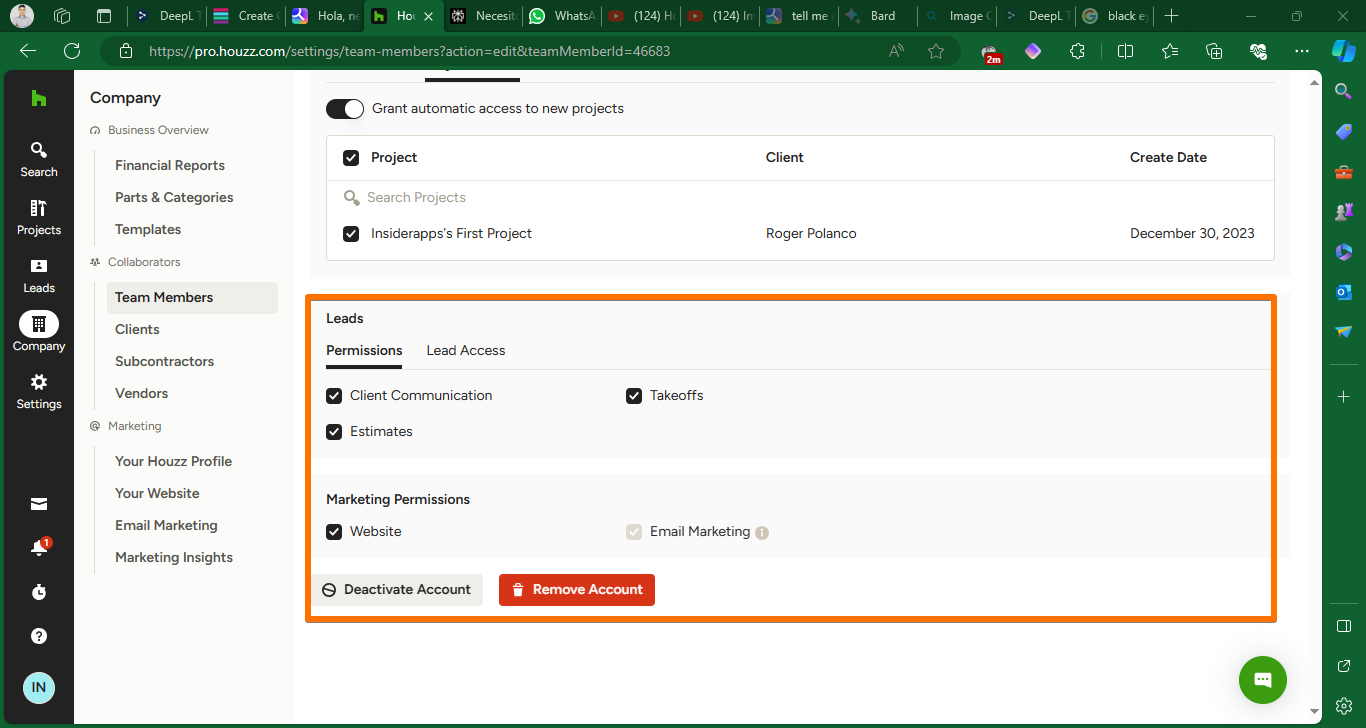
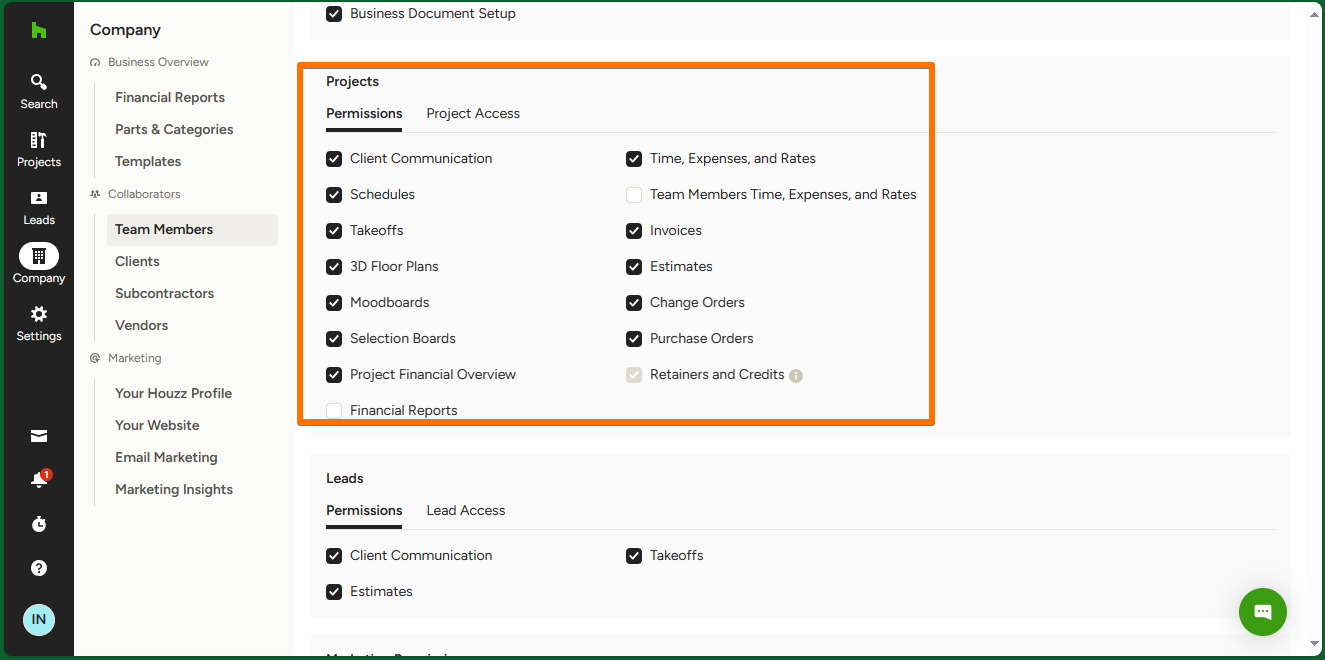
Next, we move on to the Projects section. Foremost, we will see about permissions. This is very important, because we will be able to edit all the information related to the access permissions to the different functionalities of the tool. This allows you to customize to the maximum the access levels of each user.
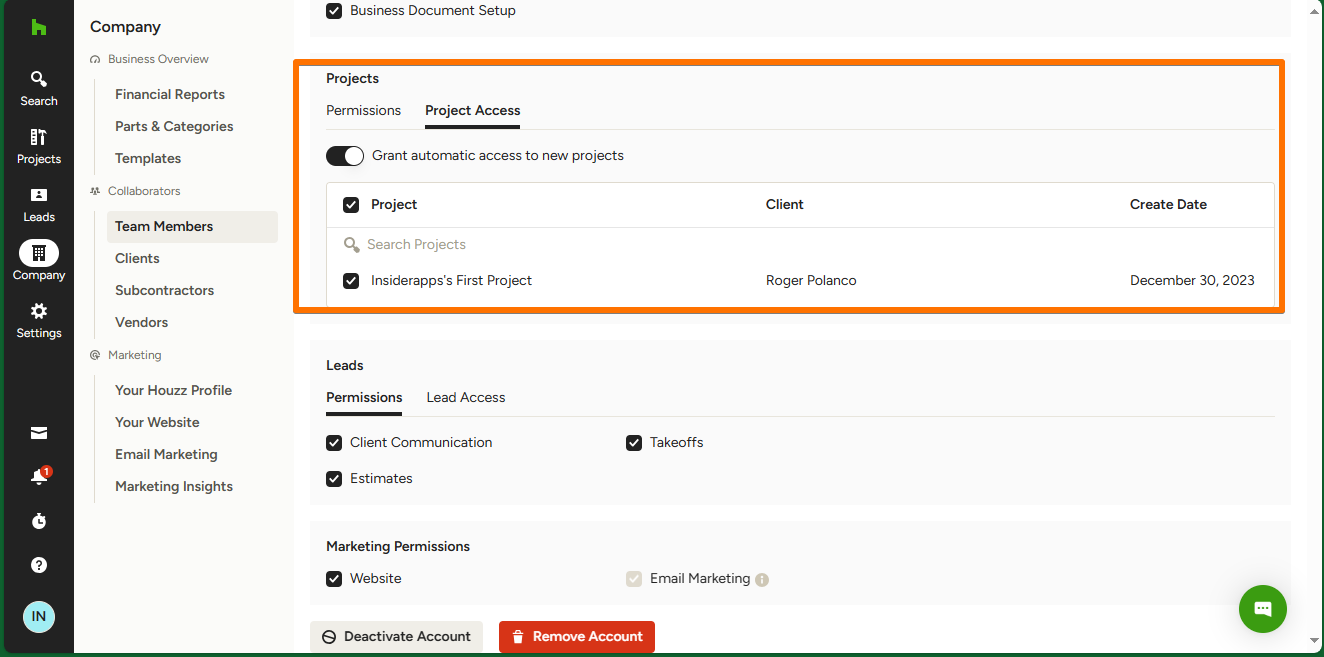
In the other tab, we will review all the elements related to the access to the different projects available.
At the bottom of the section, we find sections related to marketing. For example, permissions and access to leads, as well as permissions related to Marketing. Specifically to the website and Email marketing. Finally, we can deactivate or remove the account.
